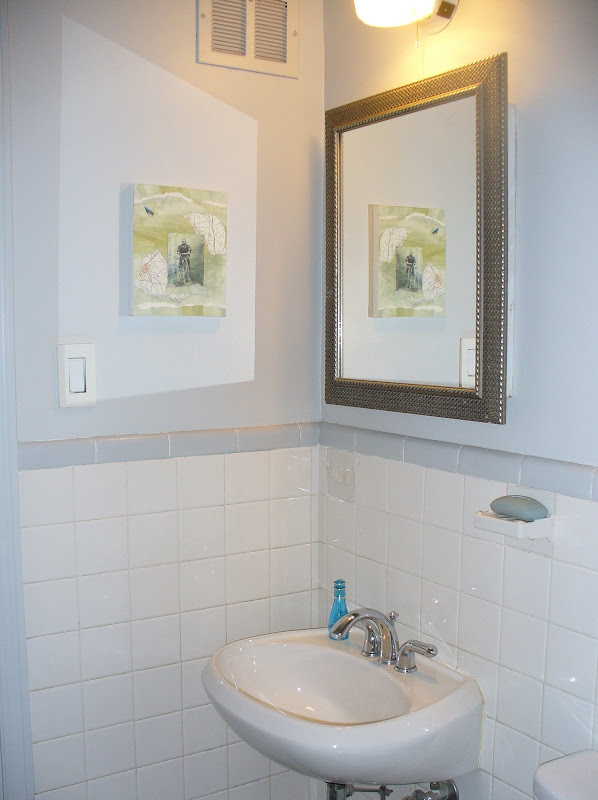
 This is not my former seafoam green 1950's sink but it might as well have been. Unfortunately, I don't have photos of my hall bathroom as it looked 10 years ago - or of the unfortunate temporary cosmetic makeover I lived with for years. So, just imagine seafoam green ceramic floor tiles, sink, and tub combined with a 1970's avocado replacement toilet and you have the picture.
Since I didn't want to spend alot of money ripping out perfectly good tiles I decided to paint (more on that later) the seafoam green trim tiles Benjamin Moore Coventry Gray HC-169. Luckily the remaining tiles in the bathroom were white.
.jpg) This is the view from the hallway, as you can see it's a small bathroom. I had high quality vinyl plantation shutters ($250) from Next Day Blinds installed. They've been there for 2 1/2 years and show no signs of adverse effects from the shower. I also had the green tub reglazed gray ($300) I went with gray, as opposed to white, because I didn't see anyway to match all the different whites - 50's white wall tiles, Toto Aquia dual-flush white toilet ($392) and the Home Depot white sink that we installed back in 1998. Plus the gray serves as a softer contrast to the gray/black mini-mosaic floor tile.
This is the view from the hallway, as you can see it's a small bathroom. I had high quality vinyl plantation shutters ($250) from Next Day Blinds installed. They've been there for 2 1/2 years and show no signs of adverse effects from the shower. I also had the green tub reglazed gray ($300) I went with gray, as opposed to white, because I didn't see anyway to match all the different whites - 50's white wall tiles, Toto Aquia dual-flush white toilet ($392) and the Home Depot white sink that we installed back in 1998. Plus the gray serves as a softer contrast to the gray/black mini-mosaic floor tile..jpg) This sink was a quick replacement back in 1998. It originally was a Home Depot pedestal sink purchased for $38 (not kidding) However, after removing the pedestal for the floor installation we discovered it wasn't providing any support and liked how it opened up the bathroom not having it there. It's a small sink but there is a heating vent lower down in the wall that really limits options. The Delta faucet ($60) was also purchased back in '98 - eventually I'll replace it with something more stylish.
This sink was a quick replacement back in 1998. It originally was a Home Depot pedestal sink purchased for $38 (not kidding) However, after removing the pedestal for the floor installation we discovered it wasn't providing any support and liked how it opened up the bathroom not having it there. It's a small sink but there is a heating vent lower down in the wall that really limits options. The Delta faucet ($60) was also purchased back in '98 - eventually I'll replace it with something more stylish..jpg) The door was painted white but I changed it to match the walls which are Benjamin Moore Stonington Gray, HC-170. It's a small room and I like how the gray door blends in.
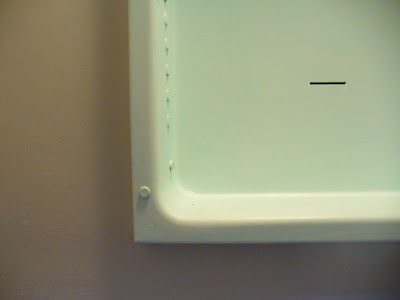
The door was painted white but I changed it to match the walls which are Benjamin Moore Stonington Gray, HC-170. It's a small room and I like how the gray door blends in..jpg) Here you can see along the edges of the vent the green color I painted the bathroom when it was in its "temporary" stage. Below is the green tile color and an example of the original floor tile - only it was green.
Here you can see along the edges of the vent the green color I painted the bathroom when it was in its "temporary" stage. Below is the green tile color and an example of the original floor tile - only it was green..jpg)
 Now, ABOUT PAINTING CERAMIC TILES...I painted these gray 5 years ago. Below is the damage that occurred when the new floors were installed. Prior to that, the painted trim tiles survived 5 years of use without any chipping. I didn't use ceramic paint. Instead I first applied 2 separate coats of Sherwin williams PrepRite 200 Interior Latex Primer and then regular Benjamin Moore semi-gloss Conventry Gray. The paint formulated for ceramic surfaces seemed to have more VOCs and I didn't want to use it. I think painting the trim tile worked because it is not subject to water the way a floor tile or wall tile in a shower would be. You can't clean these painted tiles by scrubbing them. Instead I use damp paper towels without any problem.
.jpg) Here's my solution for covering my very 1950's looking mirror medicine cabinet. I found a lightweight 20"wide X 24" high mirror ($25) and attached it to the original mirror with eye screws and picture hanging wire. The cabinet still opens as widely as it did before because the mirror just clears the wall.
Here's my solution for covering my very 1950's looking mirror medicine cabinet. I found a lightweight 20"wide X 24" high mirror ($25) and attached it to the original mirror with eye screws and picture hanging wire. The cabinet still opens as widely as it did before because the mirror just clears the wall..jpg) I painted the interior w/Sherwin Williams paint - Swimming Pool is the name. It's a bit aqua but my kids like and it was leftover from another project.
I painted the interior w/Sherwin Williams paint - Swimming Pool is the name. It's a bit aqua but my kids like and it was leftover from another project..jpg) To make the trim appear more realistic, I painstakenly avoided painting the grout between each tile. Some people haven't realized they've been painted until I tell them.
To make the trim appear more realistic, I painstakenly avoided painting the grout between each tile. Some people haven't realized they've been painted until I tell them. .jpg)
.jpg)
.jpg)
.jpg) Here I decide to bring the wall paint color right through to the ceiling. It adds height to the room and made the painting so much easier. The walls are in Pearl finish, Benjamin Moore Stonington Gray HC-170. Cost for all the paint was $90.
Here I decide to bring the wall paint color right through to the ceiling. It adds height to the room and made the painting so much easier. The walls are in Pearl finish, Benjamin Moore Stonington Gray HC-170. Cost for all the paint was $90.
.jpg) Up to this point, the total cost has been $1,155. Now time to fess up - the floor is where I splurged as compared to the rest of the bathroom. I chose the mini basketweave in St Regis Gray and Morgan Black from the Madison Collection - Renaissance Tile. The floor cost $1,100, bringing the total bathroom makeover to $2,255. Interestingly enough, almost every male guest who has visited our house remarks on this bathroom floor. They seem to really like it! However, I think with some careful shopping you could find a floor that makes a statement for less money than I paid.
Up to this point, the total cost has been $1,155. Now time to fess up - the floor is where I splurged as compared to the rest of the bathroom. I chose the mini basketweave in St Regis Gray and Morgan Black from the Madison Collection - Renaissance Tile. The floor cost $1,100, bringing the total bathroom makeover to $2,255. Interestingly enough, almost every male guest who has visited our house remarks on this bathroom floor. They seem to really like it! However, I think with some careful shopping you could find a floor that makes a statement for less money than I paid..jpg) The wreath is a leftover from Christmas. I need to find something else for this wall - round shapes seem to work the best and I"m thinking of something in a darker pink for some contrast to the gray. Also I think it's time to replace the yellowed rod cover w/either a white or gray one!
The wreath is a leftover from Christmas. I need to find something else for this wall - round shapes seem to work the best and I"m thinking of something in a darker pink for some contrast to the gray. Also I think it's time to replace the yellowed rod cover w/either a white or gray one!
Here's a closer look at the Toto Aquia dual -flush toilet. I can HIGHLY recommend this toilet - it is like magic! I was quoted prices from $750 - 1,000 for it at local bath showrooms but purchased it from Cowan Supply in Atlanta for $392, free delivery. Besides working extremely well and offering a .9 GPF option, I love how the skirt extends to the floor. It covers the unattractive "tubing" of the toilet and makes for very easy cleaning. I plan to use this same toilet for the remaining 2 bathrooms - one of which has the distinction of being pink and black!


No comments:
Post a Comment